PE: How to Make a Large Emoticon

11 min read

Deviation Actions

IceXDragon's avatar
By
Published:
8.2K Views


How to Make a Large Emoticon


Massive emote bump by Droneguard OM NOM NOM by prosaix BIG tardgrinn FanArt by Krissi001

I have been asked many times how I make my big emoticons. How I shade it, dither it, etc, so I am going to make a step by step tutorial on how I make large emoticons.:D Even if you already know how to, you might find something useful in this.;) Be aware that I am using photoshop elements 3.0, so this technique can be preformed in almost any program that has layers and custom pencil brush sizes and or a hollow and filled circle tool. If your program doesn't have layers or adjustable circles of any kind (whether it be the pencil tool or the circle tool), you should be able to get around it somehow, but if you can't figure it out, I would recommend gimp. It works on Macs, Windows, or Linux computers. You can get a free download at gimp.org.:nod:


Step 1
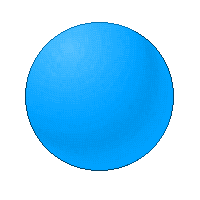
Start by making a hollow circle. The color of it should be a really dark shade of the color you want the emote to be. I'm making a blue emote, so I'm making the outline dark blue.:D This circle is 149x149 pixels tall and wide total. I did it by making a solid circle with the pencil tool by making it 149 pixels. After that I set the eraser tool to pencil, and made a 147 pixel crater in the 149 pixel circle I already had. If you do it this way, always make the crater with the eraser tool 2 pixels smaller than the colored solid circle you made with the normal pencil tool. Like if you're going to make a 80 pixel circle for the emote, put a 78 pixel crater in it with the eraser.:nod: When the circle goes hollow after you erase the middle, make sure the lines are only connected diagonally at "turns". If you end up with some pixels connecting vertically or horizontally, simply erase them from the inside. You should come up with the image above.

This circle can also be accomplished with the circle tool. If you do though, again, make sure all the turn points are connected diagonally only.:)

Step 2
Make a new layer and put it under the outline. Now, using the pencil tool, make it the same size as you did for the outline (or just use the circle tool again, only make it solid.). Color the whole outline the color you want the emote to be (I call this a "base" color). Like in the animation above, keep the circle the same size and make it a tiny bit darker as you move up to the direction you want it shaded. Make it more dark, keep it the same size and move up. Then make it lighter, keeping it the same size, and light (same size again), and then lighter, only now make the brush smaller while you still move up. Keep going more and more light as you decrease the brush size each time, until you get down to 10 pixels or so.:la:

Step 3
Remove the unnecessary parts.

Step 4Big emote 4 2 by IceXDragon

Now for the dithering!:dummy: If you already know how to dither, you can skip this part, but if you don't, please proceed.:aww: start by taking the light color on the bottom (on mine it's the bottom right), and making a "checker board" pattern on the next color (see the image above). It doesn't have to be perfect pixel for pixel, but try to make it the best you can. Now make a few random pixels like I did on top of the checker board pattern using the same color. Then take the color on top and make random pixels below the checker board pattern. I made the contrast higher on the one to the right, so you can see my dithering pattern a little better.;)

Note that as you get more experience, like any art form, try to establish your own dithering style.;) We wouldn't want all of our big emotes looking the same, would we?:giggle:

Step 5
Continue dithering until you have dithered all the colors. Should look something like this.^

Step 6
Highlight the top and bottom corner, like in the picture above.

Step 7
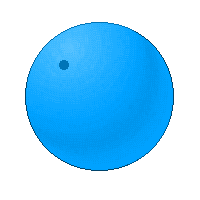
On a new layer, make the pencil brush 10 pixels (or whatever size you find most appealing), and put a circle somewhere on the emote.

Step 8
Set the pencil tool back to 1 pixel, and make it black. Set the opacity to 20%, and shade like I did in the image above. Now, make the brush white, and change the opacity to 16%-18%. Again, shade like above. Now finally make it black again, set the opacity to 7%-10%, and shade like I did above on the top left of the eye.:meow:

Step 9
I like to add a little pupil in there, but you don't have to if you don't want to.:giggle:

Step 10
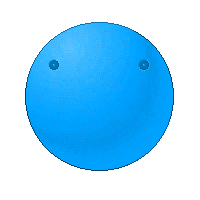
Copy the eye layer, and then arrange the eyes to where you want them.:dummy:

Step 11
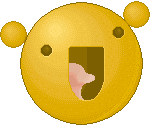
Add a mouth if necessary, shade it much like you did the eyes.c:

Step 12
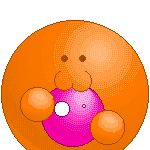
Now make some hands!:dummy: Make the hand just like how you made the big emote base, only on a smaller scale.:giggle:

Step 13
Just copy the hand you made, adjust them, and you're done!:iconlawooplz:

Massive c: Tutorial Included! by IceXDragon

I hope you found this tutorial helpful!:la: If you have any further questions please ask below.:aww:


© 2012 - 2024 IceXDragon
Comments76
Join the community to add your comment. Already a deviant? Log In
SpaceNimation's avatar
I've made this :  Tinky x Walten Animated Gif by SpaceNimation

And added it to the large emotions (up to 150x150) and i can not see it. I've added it yesterday. How much do you need to wait for the large amotion to come up?
(the # with slendytubbies should work but i didn't show up, i've seen my other emotion which is my profile picture)